Whew what a day! Complete with torrential rainstorms and saturated humid interior air. Still, we made tons of progress. Beth and I worked on the scaffold, sitting on plastic crates, while good-natured Roos stood the entire day on a ladder working on the left marbled column.
We started by consolidating—or reattaching to the wall—areas of paint that had lifted and curled up from the wall. Some areas exhibit several layers of paint—applied over many years-- which makes for a very thick, brittle paint film. The wonderful and incredibly knowledgable Harriet Irgang consulted with Roos and Beth during this previous week, working with them to develop the best treatment method. First we wet the lifted paint through tissue paper, with ethanol:distilled water, 1:1. This is allows the paint to relax back into position. Next we apply the consolidant—which is called BEVA D8 and is aqueous, or in a water solution. The adhesive looks a lot like Elmer’s, which is because it is a dispersion of tiny molecules of BEVA in water—the same way milk is tiny gobules of milk fat in water.
So we apply the BEVA, which in most instances is diluted with water, and let it work its way down behind the cracks and flakes. For the really tough and heavy lifted paint fragments, we apply the BEVA undiluted directly on the back of the paint. After this, we apply some light pressure to press the paint back in place. Finally, we use a little heat where needed to smooth down the flakes.
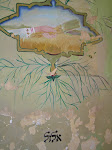
As we have been examining the painting and beginning to work, we have found some really interesting details about the history of the painting. Part of understanding how to conserve a piece involves understanding its construction—for instance, what was painted and when—and what might be the original mazel and what is more modern. We have spent a lot of time looking, slowly testing solvents and reducing overpaint to create a map of what paint is where. This is like archaeology in a sense, where you slowly move down through historical layers. One thing we know for sure is that large areas of the mazel are painted over, and we are so excited that we are able to uncover more of this original design. We have also been reducing large areas of light green overpaint—which is a bright mint color—that was applied in discrete sections throughout the piece. This distinct layer was marbled with black paint where it occurs in the marbled columns.
We are really excited about how the work is going—and I am so looking forward to the shul’s congregation getting to see our progress at services this week. We hope people visiting the shul will pick up our postcard—and post on the blog here what their thoughts are!
We just want to thank several people who have helped and shared their time and wisdom to make this project move forward—including Harriet Irgang, Norman Weiss, and Katie Gordon.
Subscribe to:
Post Comments (Atom)
01.jpg)
No comments:
Post a Comment